Decades-old conventional wisdom from the old model railroad heads of my youth drove me to pick up a decades-old IHC interlocking tower kit at a local train show recently.
Some googling quickly revealed that the old heads were more or less wrong—the IHC kit is certainly not a scale replica of Calumet or any other Calumet region tower.
But those old heads were on to something: the German-manufactured Pola interlocking tower kit marketed in North America variously by Tyco, AHM, and IHC does resemble northern Indiana and Chicagoland interlocking towers. A quick scan of interlocking tower photos in the links above show that the kit’s lines and much of its detail call back to typical interlocking towers. Indeed, the old Pola kit appears to be a composite of common interlocking tower features found in the rust belt and Appalachian regions.
Which made this classic, old-school injection molded styrene kit an excellent starting point for an interlocking tower located on a protofreelanced northwest Indiana railroad, like my Calumet Belt.
However, some aspects of the Pola interlocking tower kit virtually beg for some fixin’, at least to make it belong in the Calumet Region of my memory. Paint and finish will do most of the work of plain-ifying this kit, which is molded—and typically built by model railroaders—in multiple bright colors, typical of most European-manufactured model railroad structure kits. A few other visual issues required more handiwork to address.
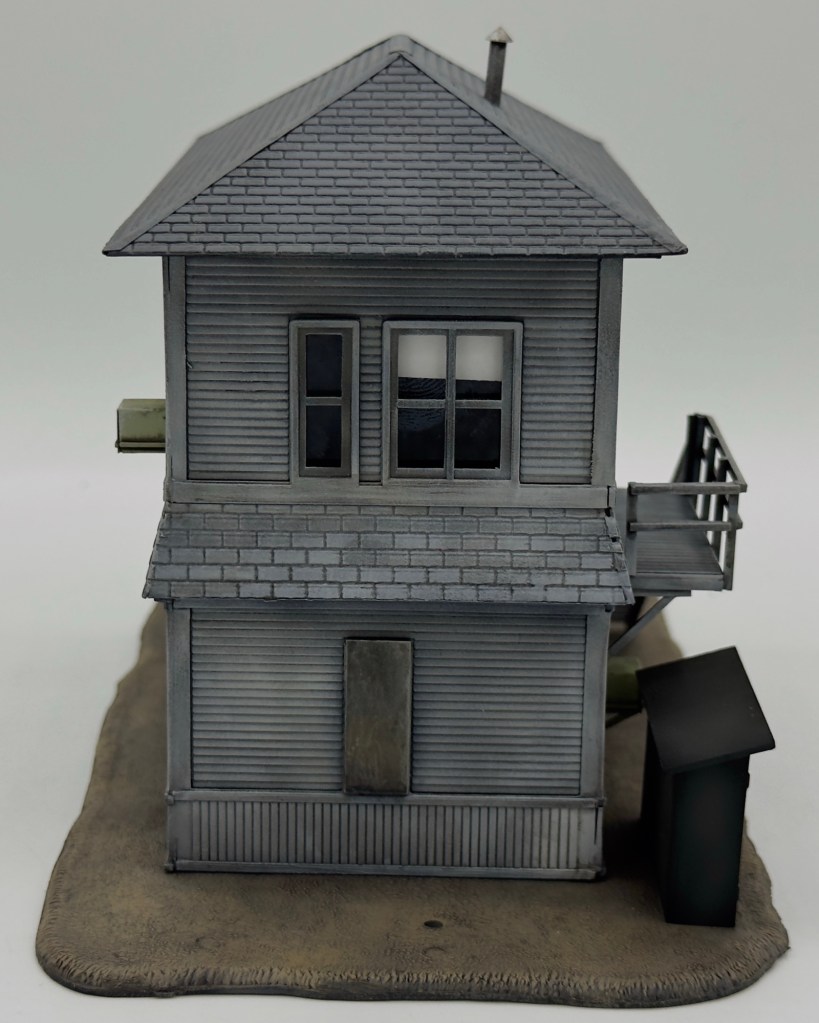
The roof, for example, is generally correct in shape, but adorned with decidedly European tile shingles and ridge caps. Thicker- and wider-than-scale gutters and even more egregiously out-of-scale ice dam details complicate the roofline. The overall result is a roof that looks more ornate, and maybe even more European, than a typical lineside company roof in flyover America.
The shingle strip between the first and second floors is also a bit of a flourish, and many midwest towers didn’t have this feature. (Calumet Tower, like the Porter and Hartsdale towers that were even more familiar to me, did not have such a shingle ‘skirt’.) However, I calculated that this ‘hip’ detail could be made less conspicuous with the finish.
The Pola tower windows also seemed atypical to my eye, with oddly located sills and interior members. And that kit-provided chimney looks downright Dickensian or maybe even Seussian.
With some ideas of how I wanted bash this old Pola standard, I started construction with brute-force simpification of the roof lines on the single, sturdy one piece roof part.
First, I sawed off the gutters using the gutter channel to guide a razor saw, and then dressing the resulting edge with a sanding block. The ice dams were clipped flush with heavy sprue-cutting side cutters. A large, coarse sanding block removed the remnants of the ice dams and the protruding tile ridge caps, ultimately sanding each facet of the roof into a more-or-less continuous plane.
JTT asphalt shingle sheet material was fitted over each roof facet, taking care to keep the four pieces correctly oriented and the bottom shingle course straight and square, with one course overlapping the original roof part edge. Once fitted, each piece of the shingle materials was cemeented to the original part.
The ridge caps were formed from copier paper, first creased and then cut into a 6 scale inch strip. Each cap as fitted on to its ridge, and then soaked with VMS Paper Shaper, applied with a pointy #1 brush. The Paper Shaper product is clear varnish or acrylic glue that both adheres the paper ridge caps to the roof and dries rock hard. Once the caps were in place and starting to set, they were trimmed flush with the roof edge using a small scissors.
Evergreen HO scale 2×6 strips were fitted and cemented into to a convenient step set a few scale inches from edge of the r bottom of the roof part. A Tichy stove chimney pipe—decidedly nondescript and unexciting, but functional— was fitted, but not cemented, and set aside for painting
Before assembling the walls, the windows were ‘corrected’ into a more symmetrical, visually simpler configuration. The interior sills and members were clipped away with sprue cutters and smoothed flat with a few swipes of a sanding stick. The original sills were roughly .040″x.060″ in cross section, and a fence was set in my NWSL Chopper to mass produce new sills from matching Evergreen styrene strip stock. This size is admittedly a little heavy for HO, but they do match the kit windows and saved the effort of sourcing and fitting new windows.
Before assembling each of the four walls, mounting holes for exterior lighting and other details were either filled with styrene rod or blanked over with rectangular bits of .010” styrene.
Once each the walls were assembled, .010“ styrene was cut and fitted to the bottom floor windows and transoms on both floors, with the objective of representing blanked or boarded windows, common among decaying or decrepit railroad buildings of the 70s-90s.
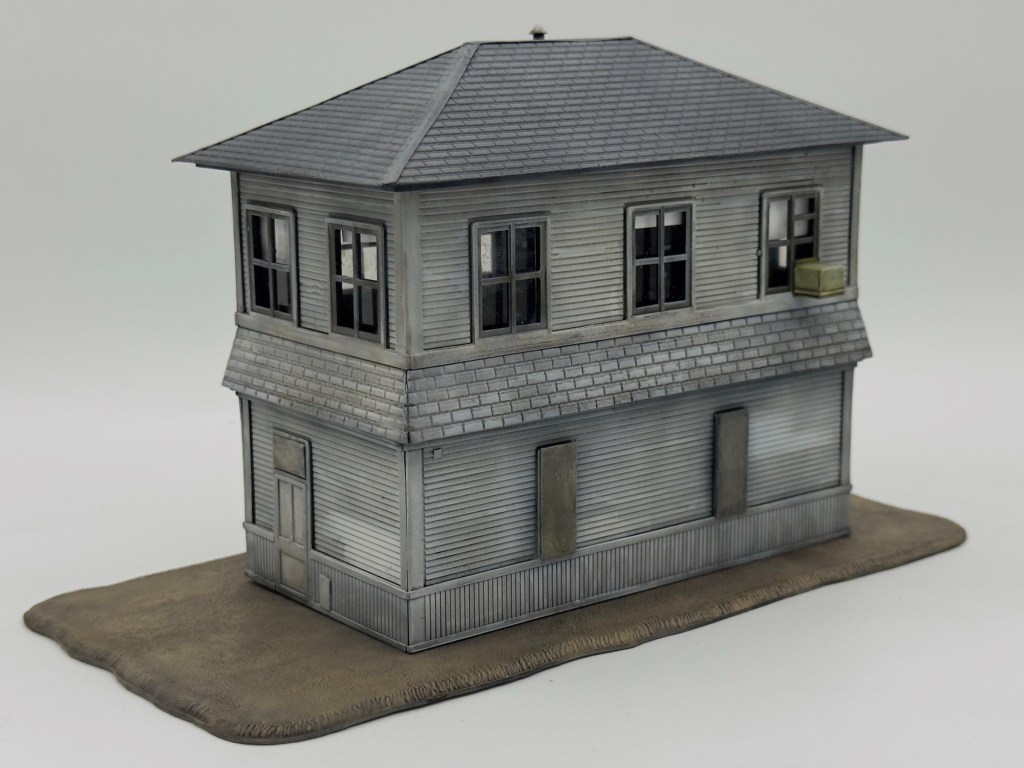
Two High Tech Details window air conditioners were assembled and and set aside for painting, an important ‘period’ detail for application to the windows.
Many model railroaders build and finish whole structure walls, and then assemble them as subassemblies. I assembled the walls, but did not paint them. My main worry was the corner joints on this possibly decades-old kit, which had been manufactured from certainly decades-old injection mold tooling. The corners would likely need filling and sanding that would best be addressed before, rather than during or after paint.
The wall parts assembled well with sturdy joints, and sure enough, with some gaping maws between walls and trim parts.
Instead of putty or filler, strips and rods of styrene were fitted tightly into the joint gaps and cemented into place. After allowing the filler strips to dry overnight, they easily sanded smooth, or left natural-looking joint lines.
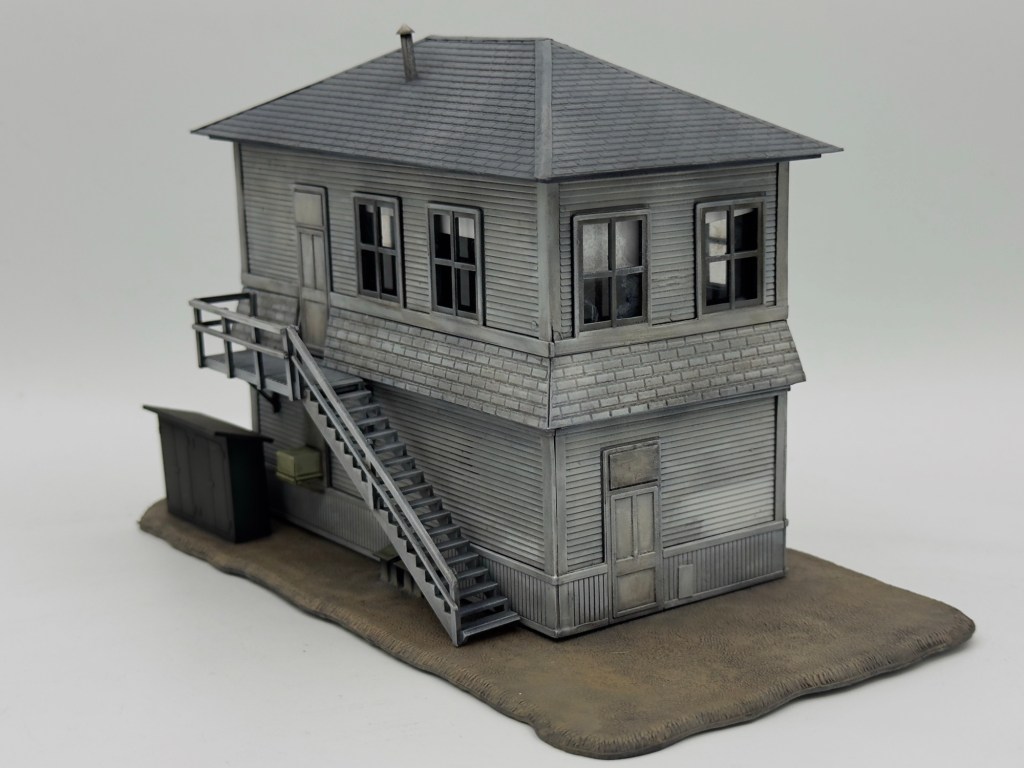
The stairway and deck assembly was constructed with particular emphasis on squareness. The base is awkward, but includes some foundation details that were assembled in preparation for paint.
With the main subassemblies completed, painting began with a coat of Rustoleum Enamel Flat Black Primer, including the inside of the main four-walls and roof subassemblies.
To keep the model plain, I chose deliberately muted colors. The siding color is AK Real White Gray, and the roof color is AK Real Gunship Gray. The main colors were applied ‘small’: thinned heavily (1:1 or greater thinner to paint ratio), 10-15 PSI, through a .3 mm airbrush. This method allows gradual buildup of color over over the black primer base, imparting depth and tonal variation that replicates aging, deteriorating paint.
Heavier buildup of paint creates the effect of newer, fresher, or at least less aged paint. This effect was applied to the doors and some the trim. By arranging post-it notes as masks on the siding, the build-up of paint represented siding that had been painted or replaced piecemeal.
The upper floor window frames and bottom floor window blanking were mostly still black as result of the ‘painting small’ approach. Nonetheless, the windows and blanks were masked with Tamiya tape, a straightforward process that mostly involved overlapping various widths of tape. The upstairs windows were airbrushed heavily thinned AK Real Helo Drab, a muted gray-green; the downstairs window blanks a drab mix of Tamiya Light Sea Gray and Buff.
Remaining details, still separate, were painted. The Tichy smoke stack were misted with Tamiya AS-29 Silver out of a rattle can. The air conditioners were airbrushed a custom mixed light gray green.
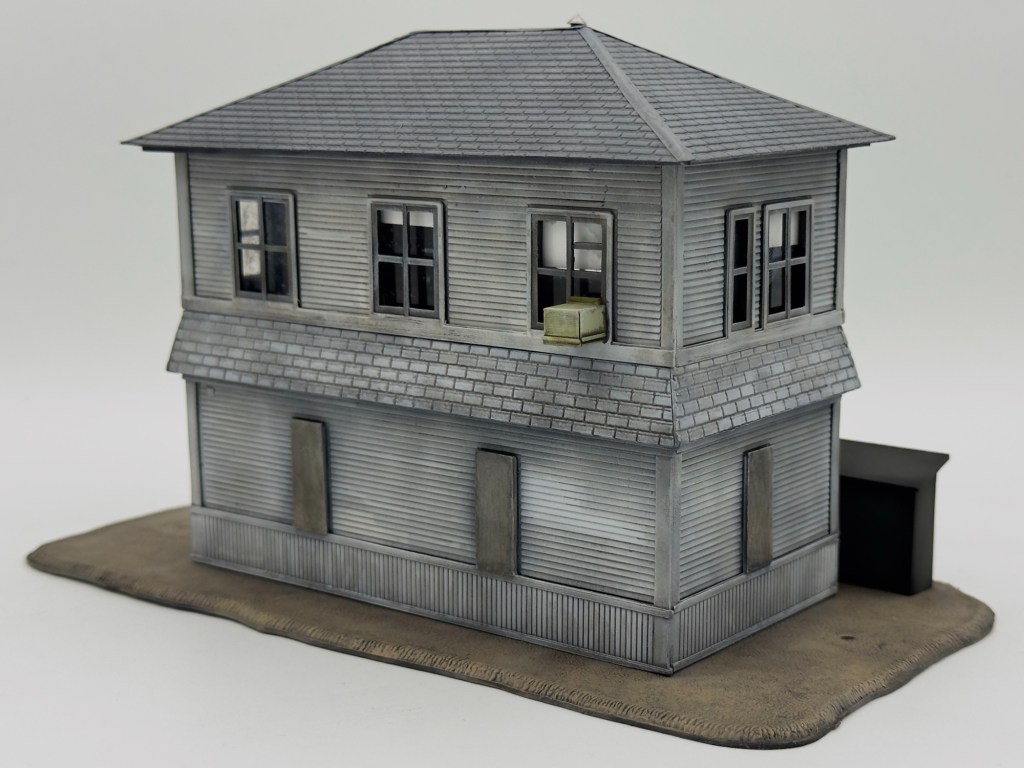
The base received a mottled, cloudy mix of Tamiya Light Sea Gray and Buff. ProAcryl Brown Wash over the mottled earth colors, followed by a heavily dry brushed application of Ammo Light Earth Dry Brush Dio paint made the base ‘earthy’ looking— a temporary measure, as the model will blended into scenery and ground cover once it is place on a layout, or more likely a photo plank for posing railroad model photos.
At this point, the model had a decidedly grungy, disused look, but I wanted it to have an even more faded and weather-bleached patina. After a gloss coat to facilitate flow, Tamiya Dark Brown panel liner was flowed in the details of the subassemblies. Major tide marks were brushed away with AK Quick Thinner.
The main base colors— AK Real White Gray for the siding and AK Real Gunship Gray for the roof—were thinned very heavily (75:25 thinner to paint) and misted on to the model to subdue and blend the color effects applied so far.
A final step in color blending was an overall dry brush of oils. The siding was dry brushed with a blend of mostly white oil paint offset with a smidgeon Abt. 502 Starship Filth. The roof received a similar treatment, with more more Starship Filth added to the already off-white oil blend.
After the dry brushed oils set for a day or so, all the subassemblies received an application of VMS Matt Varnish, which sealed the paint effects applied so far.
Before permanently attaching the various subassemblies, I glazed and dressed the windows. I briefly entertained the idea of precisely cutting glazing material to fit the very shallow window recesses on the interior of the tower walls. However, test fitting revealed that such precision would not look any better than attaching larger pieces of glazing material to the kit wall interiors. My go-to glazing material, microscope slide glass, was slid into place on the interior walls behind the window openings, and secured with drops of BSI Gold Thin CA cement. Shades were cut from heavy paper stock and randomly placed in the various windows, also cemented into place the with the Gold CA.
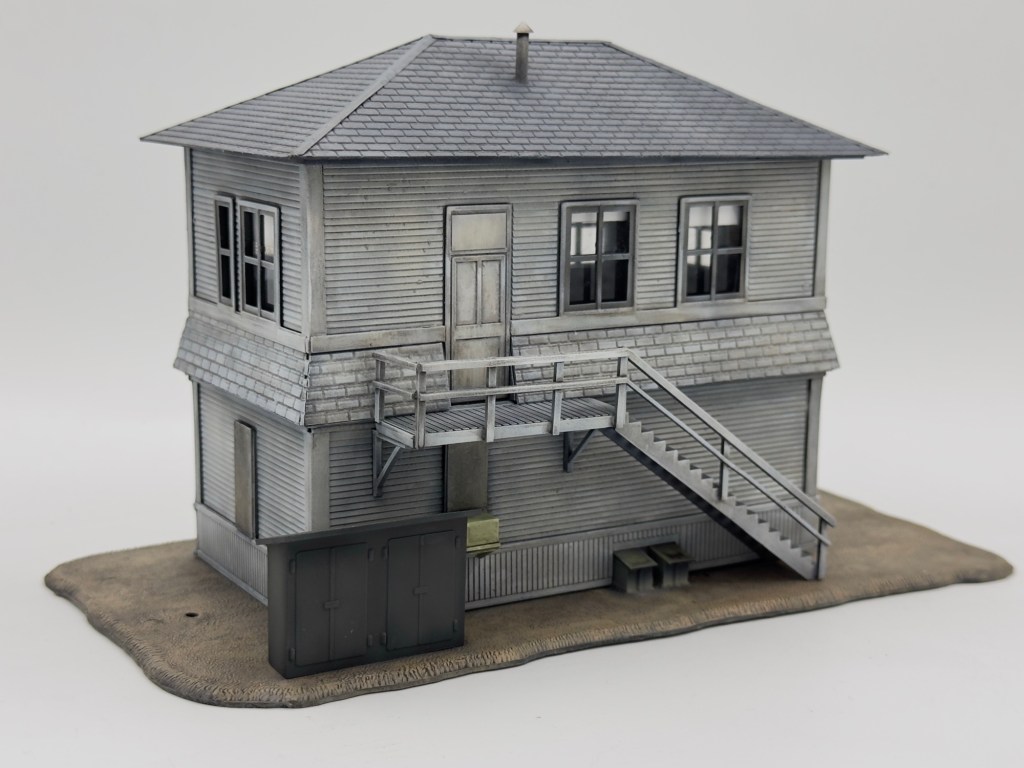
With the window glazing and treatments secure, the stairway and deck were attached, as was the roof, smokestack, and air conditioners. The model snap-fits onto the supplied base, which is where it will stay until the model is sceniced into place.
The tower is mostly done. In addition to a scenic treatment, it also needs some exterior lighting fixtures and signage. In my mind, the names ‘Burns’ or ‘Hart’—both big drainers of swamps and diggers of canals in the Calumet region—seem like good place names.
Once again, a model railroad structure project brought me great joy. I look forward to another building sometime soon!

Leave a comment