Model railroading is all but unique among the model making hobbies for its tradition of blending fact with fiction—think prototype-based scale models of trains, but combined in imaginary ways, often running on imaginary or prototype-inspired rail lines.
Longtime readers of my Up Dunes Junction and Sprue Pie With Frets blogs know that my model making interests run far and wide, across time periods, subjects, fact, and fiction. While I enjoy making scale reproductions of tanks and science fiction spacecraft and Volkswagen buses, I look to model railroading as an opportunity for intellectual, high-concept fun, a place to conjure up a slightly different, and perhaps more interesting and hopeful world.
The best-known fictional, or ‘protofreelanced’, model railroads artfully and knowledgeably combine creative modeling with deep knowledge and affection for the look and workings of real railroads and places. Perhaps the best known protofreelanced model railroad is Allen McClelland’s Virginian and Ohio, a hardworking, coal-hauling (model) railroad and a veritable love letter to green, lush Appalachian coal country. The V&O’s landmark achievement has been featured in two books and countless model railroad magazine articles.
Jim Hediger’s Ohio Southern, Bob Hegge’s Crooked Mountain Lines, Tom Johnson’s Cass County, and Eric Brooman’s Utah Belt are among my favorite inspirational, well-known examples of evolved protofreelanced model railroads. I particularly admire each for their notable individual features and achievements.
- The Ohio Southern and Utah Belt achieve the look of contemporary railroading with believable colors, graphics, and portrayal of distinctive regional vistas.
- The Crooked Mountain lines featured excellent modeling of electric railroading, and subversively cribbed its best visual features from European mountain railroads.
- Cass County succeeds at protofreelancing on a modest scale—a hardscrabble short line cobbled out of Penn Central/Conrail-era fallen flag scraps, in a comparatively small space—and its expertly rendered visual features are instantly recognizable to this Hoosier.
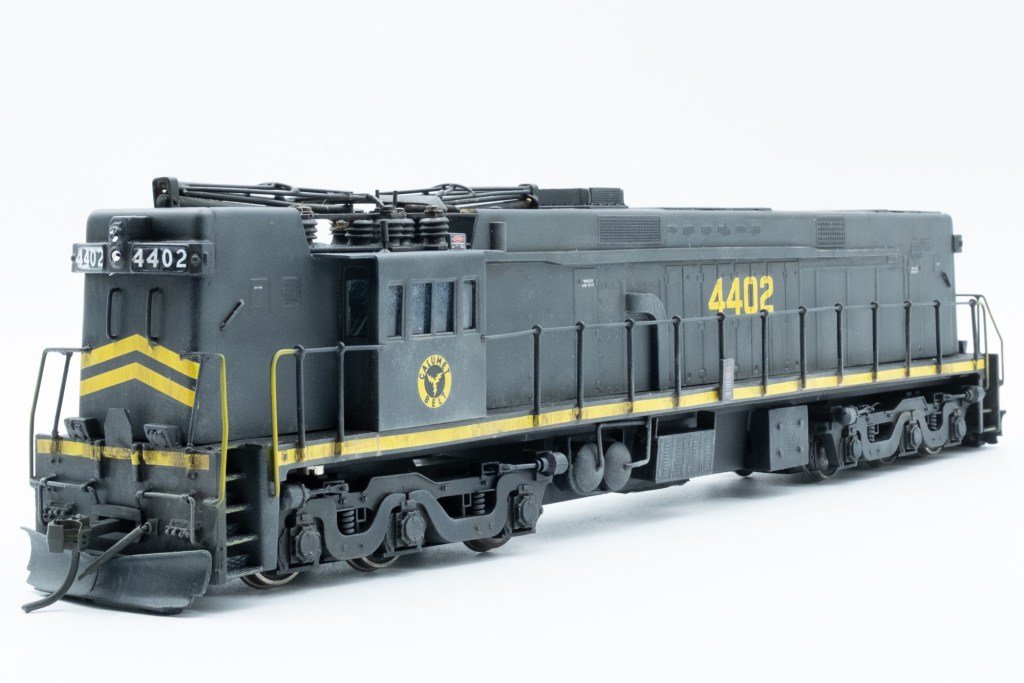
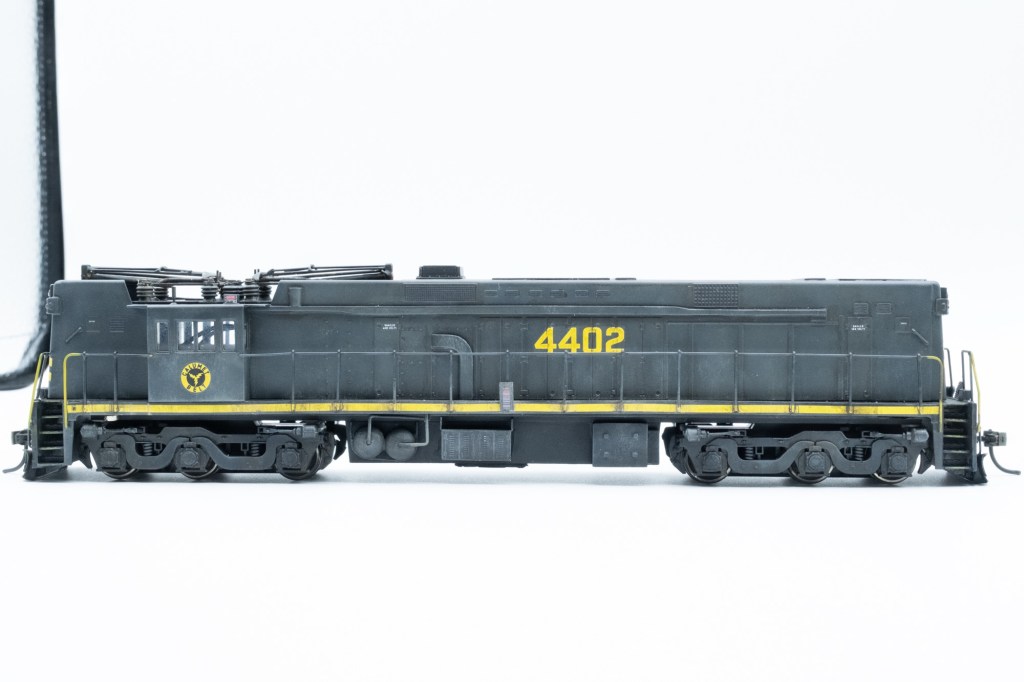
Calumet Belt is my protofreelanced railroad set in the Northwest Indiana of my youth, and this Calumet Belt E-44 4402 model launches my Calumet Belt story.
First, the Calumet Belt.
The main features of the Calumet Belt mostly trace straight back to my earliest, most formative encounters with railroads during my 70s and 80s childhood in the Calumet Region of Indiana—the northwest corner of the Hoosier state, adjacent to Chicago, Illinois.
My first railroad memories are of orange South Shore interurban cars and catenary, and also freight drags on the IHB and EJ&E, each with their austere industrial paint schemes and distinctively different rolling stock and motive power.
Calumet Belt reflects these early railroad experiences and is a Northwest Indiana and south Chicagoland railroad, a peer and competitor to the Indiana Harbor Belt, Elgin Joliet & Eastern, and the South Shore, serving the smokestack industries of the Calumet region and also providing and economical and environmentally friendly (more on that shortly) bridge routing around Chicago. Like the J and the IHB, Calumet Belt has an austere industrial livery, and drags a lot of steel, electric utility, petrochemical, and automotive traffic.
Calumet Belt also connects directly to my first immersion in trains and modeling on the pages of books and magazines. I pored over 70s-era model railroad magazine articles on the Ohio Southern and Crooked Mountain Lines. By middle school, I had devoured Bill Middleton’s When the Steam Railroads Electrified—the best overall record of heavy electric railroading in North America—and excitedly read Trains magazine stories about 70s- and 80s-era flirtations with railroad electrification, notably the rise of electrified robotic coal haulers and on-again/off-again Class 1 railroad interest in response to skyrocketing diesel fuel costs. Quiet, efficient electric railroads were my geeky tweenage jam—and still are.
Because of my abiding affection for pantographs and catenary, plain industrial paint schemes are where Calumet Belt’s resemblance to its peer Calumet region belt lines ends. While IHB relied on EMD SW and NW power in the 70s and 80s, and the J standardized on non-turbocharged EMD SDs for its main lines, the Calumet Belt doubled down on its electrification amidst the hard times of a shrinking steel industry, energy shortages, and railroad industry reorganization. By the 80s, Calumet Belt’s roster was dominated by hand-me-downs from various robot coal haulers, electric commuter lines, and the end of Conrail electric freight operations.
(The history and the route of the Calumet Belt are stories for another time—its start, like the South Shore, was related to the electric utility industry in the early 20th century, and by the 80s had accumulated a ‘belt’ of Calumet Region-spanning trackage from Fallen Flags and former traction lines.)
In short, the Calumet Belt is a heavy electric railroad that would have been thrilling to teenage railfan me back in the late 70s and 80s. It unapologetically takes inspiration from my favorite protofreelanced railroads, as well as prototypes I know well.
Now, the model: forty-plus years later, the thrill of electric railroading and my home region’s railroading is not gone, and indeed, making this Calumet Belt E-44 was a rewarding and fun jaunt.
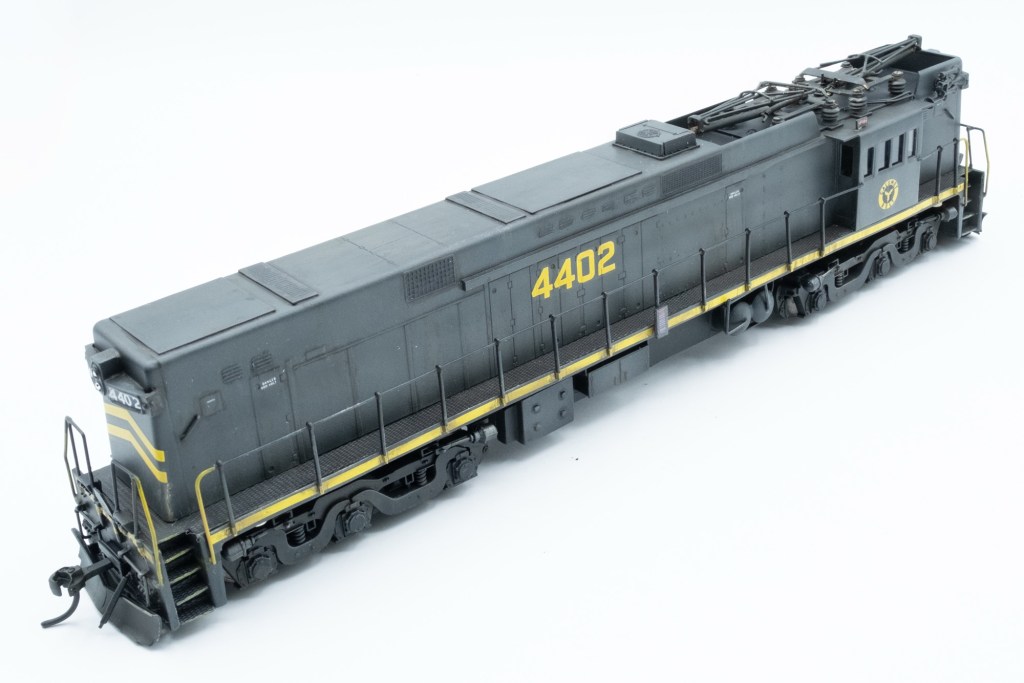
Calumet Belt 4402 started as a surprise bargain find in a rural Pennsylvania hobby shop. The ancient brass HO Alco Models E-44 was almost a basket case—it was boxless, sported more than the usual bent and broken details, apparently had suffered a major impact, and parts of it had been brushed painted flat black.
It ran, barely, but that’s to be expected from 60s and 70s vintage Alco Models brass locomotives. The model, like Alco’s diesels and diesel-like electrics of this period, had spotty electrical pickup (one side of each truck), a comically oversized and rough-running open frame motor without flywheels, and noisy open gear tower power trucks. I knew right away it would need to be repowered for DCC operation, including replacement of those coffee grinder-loud trucks.
I acquired an old Stewart C-628 with the objective of splicing its bolsters, trucks, and drive train into the Alco Models frame, per an old Railroad Model Craftsman article on remotoring and upgrading old Alco Models brass diesels. Once I disassembled both models to figure out how to cut and splice the Stewart bolsters and trucks on to the E-44, I was dubious about how good a grip the Stewart frame segment could get on the flimsy Alco Models frame, which appears to be a single stamping of .050” sheet brass.
In the process of manhandling the disassembled locomotives, I discovered that the Alco Models brass body shell very nearly fit on the Stewart frame, which has the same wheelbase as the C-628. I also noticed that the C-628’s plastic fuel tank could be removed, leaving a narrow rectangle or box of frame weight hanging under the locomotive.
Fitting and seating the Stewart frame to the Alco Models body shell required some simple drilling and milling. The stock Alco Models shell mounts to its stock frame with six pan-head machine screws that drive into .060” brass mounting pads soldered to underside of the walkways. (My near basket-case model included only four of the pan-head screws). I marked the locations of the mounting screws, and drilled new mounting holes into the Stewart frame. While the Stewart frame was in the vice on my Proxxon Drill/Mill stand, I carefully milled a shoulder into the frame around the mounting holes. The cast zinc Stewart frame is significantly thicker than the sheet brass Alco Models frame, and needed to be thinned so I could use the original panhead screws.
Theoretically, the milling would not be necessary if longer panhead screws are on hand—though they would likely be visible protruding from the frame above the E-44’s trucks. I am cheap and impatient—didn’t want to source or wait around for oddball metric screws—so chose instead to do a little crude milling to move the project along.
The prototype E-44 was configured similarly to contemporaneous diesel-electric locomotives—essentially the same frame, trucks, and even a high-hood road switcher body as an early six-axle U-boat or Century—minus the diesel engine block and underframe fuel tank. In place of that characteristic fuel tank was large open space, punctuated with a few appurtenances. The C-628’s hanging frame weight box is set in from the edge of the frame by a scale foot or two on each side, and instead of milling or sawing it flat, I opted for a compromise.
The underframe tanks, battery and switch box parts were unsoldered from the E-44 underframe, and then cut and filed to fit squarely against the C-628 frame weight box. Several of the parts turned out to be steel painted brass color, which Alco Models must have included for additional weight. This compromise allowed me to retain the strength and weight of the Stewart frame as well as looking mostly right.
I used a NixTrains Decoder Buddy mother board in place of Stewart’s mother board, because the Alco Models shell wouldn’t fit over the Stewart board, particularly the pantograph platform section of the roof. Alco Models’ headlights were not drilled out for actual lighting, and I didn’t want to drill them out myself, so I skipped LEDs altogether. An ESU LokPilot 5 decoder was fitted to the Decoder Buddy and the model ran well, particularly after auto tuning the LokPilot’s BEMF per ESU’s instructions.
Kadee 156 long shank scale whisker couplers were fitted. New mounting holes were drilled and tapped for 2-56 coupler mounting screws. Alco Models’ existing coupler mounting holes would have required a long-shanked coupler that doesn’t exist in reality, and likely wouldn’t function.
In preparation for paint, the main hood and cab assembly was unscrewed from the frame (walkways and pilots) assembly. The assemblies were scrubbed with Green Stuff detergent, soaked in stripping solvent, soaked again in industrial strength vinegar, rinsed and allowed to dry.
Rustoleum gray etching primer was then applied to the brass assemblies and allowed to dry for a couple of weeks. Loose and bent parts were repaired and CA-glued back into place.
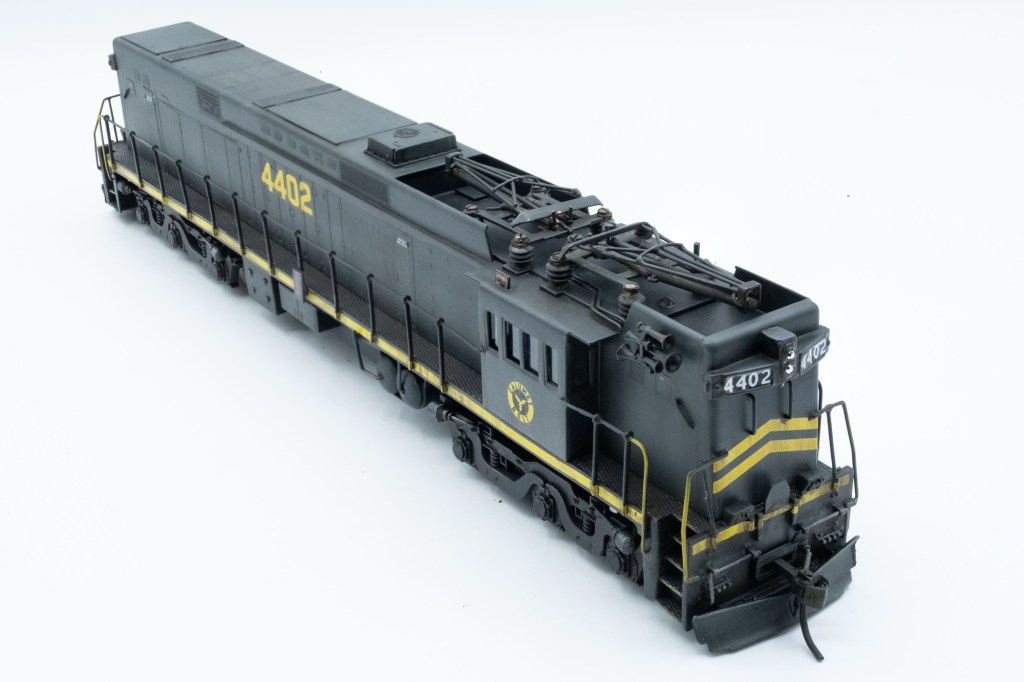
Additional details—which will be standard across future Calumet Belt motive power—were added to differentiate 4402 from its Pennsy origins. General Electric did build nearly identical E-50 electrics for the Muskingum Electric, an Ohio robot coal hauler that operated into the early 21st century. Presumably E-44s could have been built for other electrified roads in the early 1960s—they were built by GE and didn’t have the uniquely Pennsy-built look of GG1s and P5s—and I wanted the model to be visually distinct from its Pennsy origins.
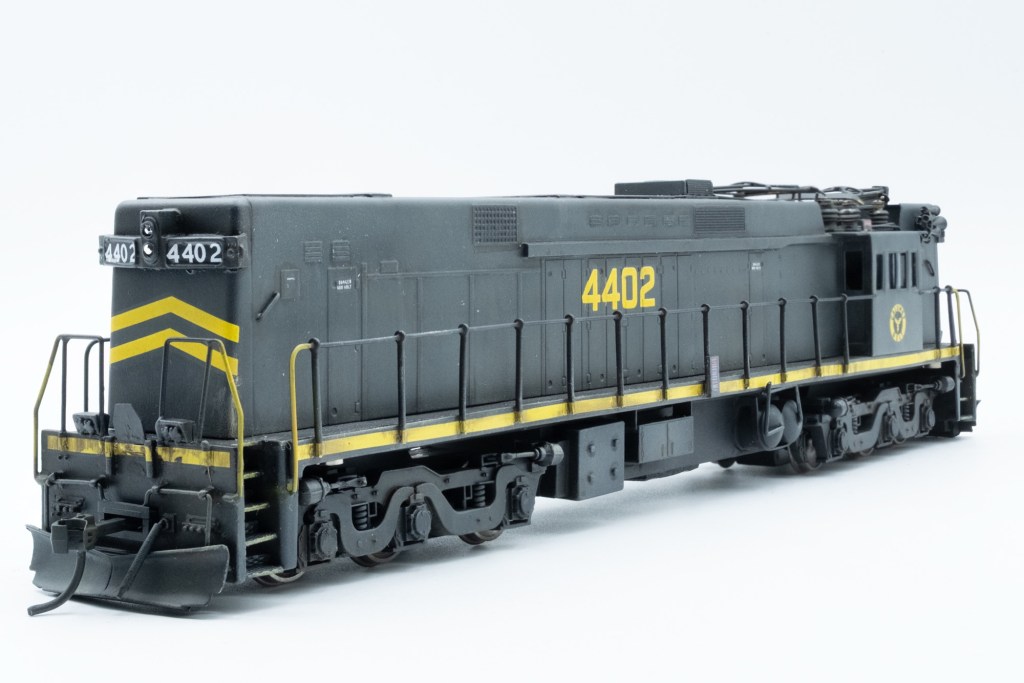
Notably, 4402 has weed cutter snowplows (cribbed from EJ&E’s application on its road power), a big ol’ five chime horn (grade crossings everywhere in Northwest Indiana!), a firecracker radio antenna, and an air conditioner (just looks interesting to me, a barely justifiable greebly).
With the details attached to primed model, a unifying coat of Mr. Surfacer black primer was applied over all subassemblies, including the underframe and trucks, and cured for several days before applying finish colors.
As previously noted, the overall Calumet Belt look is intended to be understated and industrial. From a practical modeling standpoint, I also wanted the paint scheme to be easy to apply.
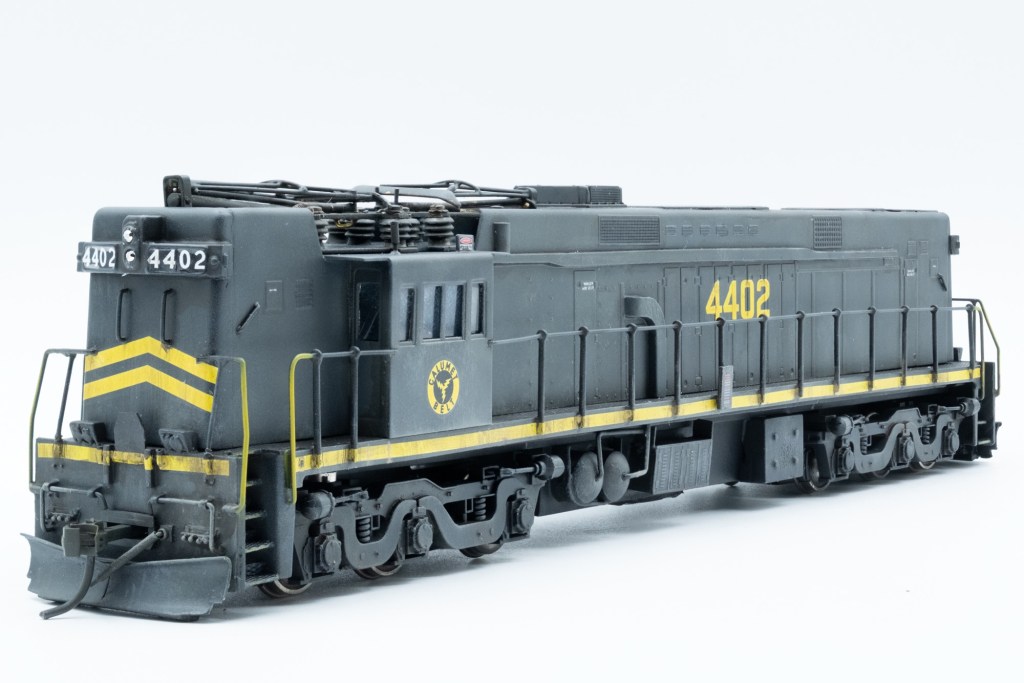
For anyone familiar with the railroads of Chicagoland and the Calumet Region, the inspirations for the Calumet Belt paint scheme are easy to pick out. Overall black with a contrasting white frame stripe with a small cab herald was the 70s-era IHB paint scheme, which provides the main thematic elements for Calumet Belt locomotives. The twin end chevrons reflect an EJ&E practice after the 70s and 80s, and also nod to Missouri Pacific, which I occasionally sighted across the state line in the south Chicago suburbs (where my favorite hobby shop, and later part-time employer, was located).
But not all the elements of the Calumet Belt paint scheme are rooted in the Region. My choice of black and yellow can be traced to two other railroads that I admired from afar: the Clinchfield, immortalized by Model Railroader magazine’s groundbreaking N scale project layout in the early 80s, and the Piedmont & Northern, a fascinating electric railroad in the Carolinas.
Piedmont & Northern also inspired the most important and visually identifiable element of the Calumet Belt look: its herald. The IHB herald mentioned previously had a distinctly New York Central-inspired ‘cigar band’ look, because NYC owned a controlling stake in IHB. Calumet Belt traces its history back to the electric utility industry, thus the radiating lightning bolts of the Calumet Belt herald, shamelessly lifted from the P&N herald. Lightning bolts also adorned some South Shore 700-class electrics, and symbolically convey Calumet Belt’s differentiating mode of propulsion.
I used Adobe Express, an entry-level graphics application, to ‘doodle’ ideas for the Calumet Belt logo, and then created refined, final art with the more advanced Adobe Illustrator. Illustrator provided the fine, infinite control and access to fonts needed to get the graphics ‘just so’ to my eye; I fully expect industrial and graphics design experts would be mortified at my results! In addition to the mostly yellow heralds and numbers for locomotives, I also created white and black versions for use on other rolling stock.
Illustrator also rendered vector-format files that could be used by Circus City Decals, who printed my custom decals at high quality for a reasonable cost. The quality of the printing was so good that I have since replaced the monitor of my main work computer. I estimate that the large A4-sized (8.27” x 11.69”, close to standard US 8 1/2” x 11” printer paper) decal sheets that Circus City printed for me work out to around $3 or $4 per model, an eminently cost-effective investment.
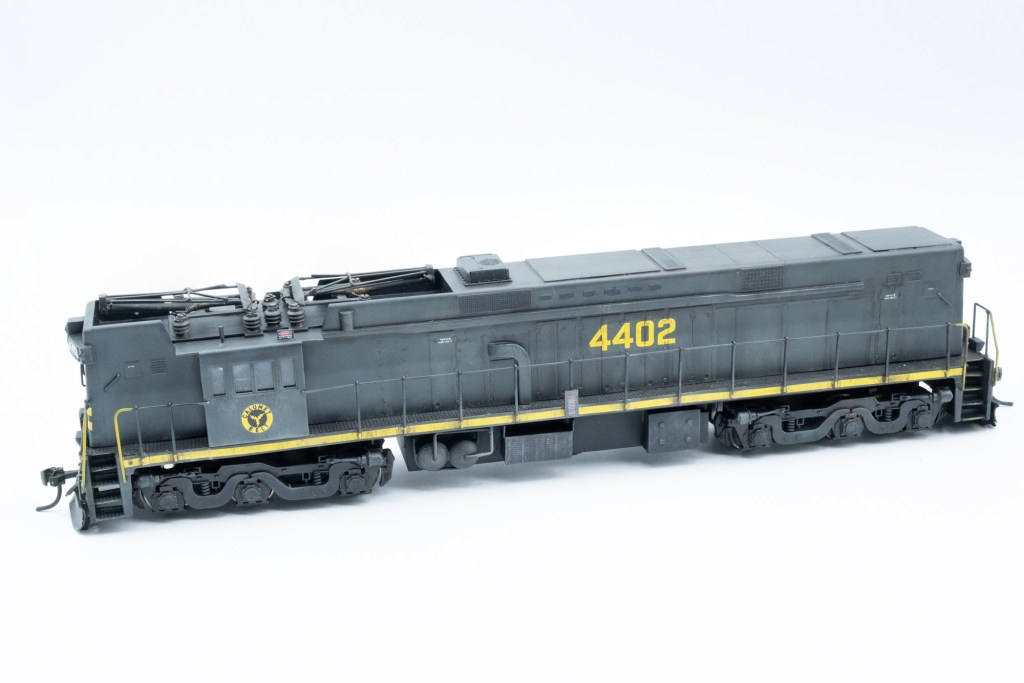
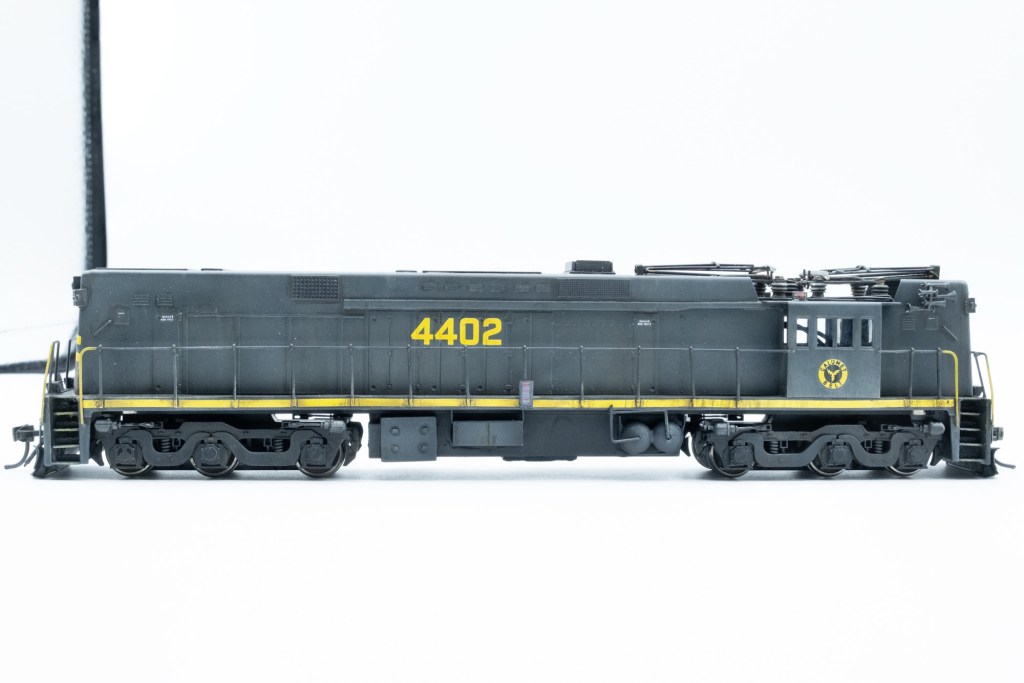
With new decals and a fully primed and cured model in hand, I launched into the final finish application for Calumet Belt 4402. The main color is my go-to for weathered black, AK Real Rubber Black. I applied the Rubber Black ‘small’, thinned just over 50/50 with GSI Creos Mr. Leveling Thinner, and applied in a small ‘cone’ or spray pattern. I deliberately filled in individual panel doors and details separately from surrounding details, imparting natural-looking tonal variations all over the model.
Once the model was fully covered with AK Real Rubber Black, I applied GSI Creos GX100 Clear Gloss in preparation for decals and weathering. The model was set aside to cure for a day or so.
The custom Circus City decals went on easily and responded well to Micro Set and Micro Sol. Putting them on the model was moving, a Dr. Frankenstein moment of the model—and to be honest, a dream—coming to life. In addition to the Circus City decals, Shell Scale number board decals were used, as well as various data and warning decals from Smokebox Graphics and Microscale.
The frame stripes were the most predictably troublesome decals, requiring some judicious slitting with a sharp scalpel blade and repeated re-applications of Micro Sol. Future Calumet Belt locomotives will likely have the frame stripes painted and masked rather than decaled.
With decals set and dry for a day or two, the decaled assemblies received a sealing coat of GX100 in preparation for weathering treatments.
Tamiya Black Panel Liner was flowed into vents and louvers. Tamiya Dark Brown Panel Liner was then applied to panel lines, access door edges, and most other details. Tamiya Brown Panel Liner, a rustier hue, was applied to the truck side frames and under body appurtenances. The Tamiya panel liner was then blended and tidied up with Ronsonol lighter fluid—hotter than the Turpenoid that works well with oils and bottled enamel washes, with a particular emphasis on breaking up ‘tide marks’, sharp lines of unblended Tamiya Panel Liner pigment. Tamiya Panel liner is a quick-drying wash that allows follow up treatments, like dot filters, with minimal disturbance.
Indeed, I used the Tamiya Panel liner products with the intention of following up quickly with oil dot filters. I used dots or Abt. 502 Dust, Starship Filth, and Raw Sienna on the hood and frame/pilot assemblies, and more browns and reds (siennas and umbers) on the truck side frames and under frame. Finally, Abt. 502 Dust oil paint was dry brushed on lower areas of the hood, the frame/pilot, and especially the trucks and underframe to represent road grime. After letting the partially weathered assemblies set for a day or so, I applied GSI Creos Clear Flat varnish.
Prior to reassembling the hood and frame/pilots back into a single contiguous shell assembly. I glazed the cab window with microscope slide glass, which lays perfectly flat and reflects light convincingly. I used a micrometer to measure the appropriate sizes, and wangled the glass into position with tweezers. The cab sides were glazed with one contiguous pane of glass spanning all four window openings. I attached a flexible Teflon ‘rat tail’ applicator to a bottle of BSI Thin Super Gold CA glue and secured each glass pane with a drop of the cement on the bottom-most corners of the glass. The Thin Super Gold—which won’t fog glass or other clear materials—spread under the glass via capillary action and set instantly, allowing quick progress to the next pane of glass.
Rejoining the hood and frame/pilots assembly required wiggling, shimmying, and negotiating, which in turn necessitated some minor post-reassembly touch up painting. The newly reassembled shell was then joined back with the drive frame and secured with the four panhead screws. Pantographs were reattached.
Headlights were the final remaining bit. I used small jewels intended for crafts for the headlight lenses, maneuver them in place with a wax pencil, securing them with tiny blobs of Aleene’s Tacky Glue.
Calumet Belt 4402 was a fun experiment and proof-of-concept for a protofreelanced heavy electric railroad that had been simmering for, well, decades. Behind it in line are a number of other Calumet Belt rolling stock projects—mostly other electric locomotives but also some non-revenue cars like cabooses and a line car.
Sadly, I do not currently have a layout on which to run 4402 or its siblings that are likely to emerge from the paint shop in the near future. But I do have a plan to build out a photo plank in the coming months that will also be a test bed for Calumet Belt right of way, including, of course, overhead poles.
Watch this space for more Calumet Belt!


Leave a comment