When I visited the UK National Railway Museum in York, UK in June for a rail safety conference, the UK-based attendees were understandably proud of their country’s rail heritage on display. While steam speed record holder Mallard overlooked the conference seating area, several of the UK rail officials and industry leaders who were in attendance remarked in knowing tones on a diesel locomotive that was located in a less-well-lit side hall: the Deltic.
Every person who mentioned the Deltic recalled admiring this large locomotive as children, and all knew that its inner workings descended from the engines of the Spitfire and Hurricane fighter planes that won the Battle of Britain during the Second World War. High praise indeed for a diesel locomotive to be almost as famous among British school children as iconic fighter planes and football heroes—I’m not sure that there’s a fighter plane or a locomotive known widely among the general population of American middle schools.
Naturally, I was all in when a static (dummy) model kit for the Deltic magically appeared. I was able to lay my hands on the Dapol Kitmaster kit for the Deltic in 00, or 1/76, scale. Dapol is among the UK’s major model railroad manufacturers, customarily offering ready-to-run rolling stock and accessories in 00 and also N and 0, or 7mm scale. Dapol acquired the tooling for Kitmaster injection styrene railway kits, which were originally tooled in the 50s and 60s. Dapol continues to offer a few Kitmaster kits that build into static, display-only 00 scale models of mostly UK steam locomotives. The Deltic kit is among the few diesels offered in the Dapol Kitmaster line.
Dapol’s packaging proudly proclaims that the kit is molded in recycled plastic, and this dubious feature likely exacerbates, or at least accentuates, evidence of the kit’s age. Recycled plastic reportedly is of lower quality and stability than new or virgin plastic, and lower plastic quality directly contributes to the formation of flash and the possibility of short-shot parts. My Deltic’s parts were heavily beset by flash, as well as warpage that was visible before assembly, as well as evident from poor part alignment during assembly.
However, the age of the Deltic tooling—over 60 years old—would be hard to overcome with even the highest quality plastic stock. A slip of paper included with the instructions tells the story of the molds, giving the impression that the Deltic tooling had been forgotten, and likely neglected, for decades. Apparently the molds had been forgotten and presumed lost, but turned up in a mislabeled crate in Dapol’s warehouse; also, explained Dapol’s documentation, molds for the Deltic’s clear parts have indeed been well and truly lost.
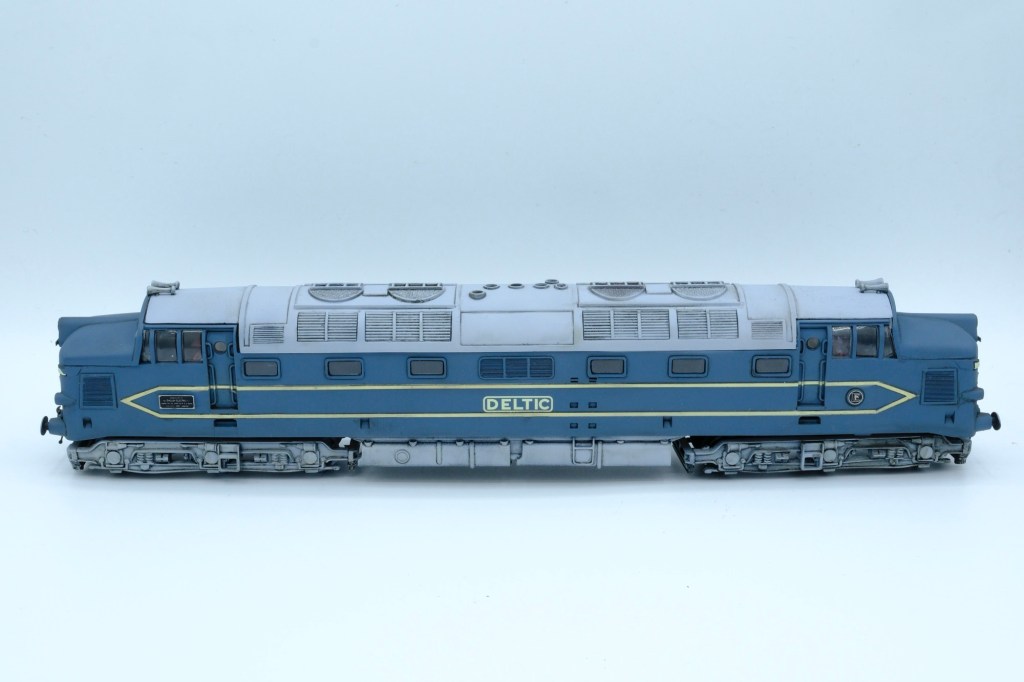
The parts also have heavy, exaggerated detail, such as molded in striping and heavy window frames—very typical for a model of this vintage. Nonetheless, the distinctive lines of the Deltic are faithfully captured, and the kit even includes reasonably well detailed cab interiors.
I assembled the kit in the order suggested by the kit instructions: frame and trucks first, then cab interiors, and then nose, front, sides and roof parts are added.
This turned out to be a mistake, as warpage and shrinkage of the parts caused some significant misalignment of the joints between the noses, sides, and roof. Most of the parts had pronounced parting lines and registration (alignment) problems as well as flash. I’m neither a materials not mechanical engineer, but I suspect that irregularities in the parts resulted from a combination of unstable recycled plastic and aged tooling.
I recommend building the body first—ends, noses, sides, roof, and then fitting the assembled and filled body to the floor and cab subassemblies. This approach would better address the outward-facing joints around the noses and roof, and focus floor and cab fitment sanding, filing, and filling on interior surfaces that aren’t visible on the exterior of the model. Regardless of assembly order, the cab interior components should be painted and assembled prior to joining the major frame and body components; the large cab windows make the cab eminently visible.
Despite the bleak outlook of the parts condition and fit, application of modeling skills—dry-fitting parts, filling gaps, adding styrene strip shims—renders the model eminently buildable. The nose area requires special attention, as does the joint between the roof and the main body. Evergreen strip stock and various filler putties, including thick CA set with accelerator and GSI Creos Mr. Dissolved Putty were used to eliminate seam lines and ensure parts fit with minimal gaps.
The kit can be easily be finished with what’s included in the packaging. Still, a few key aftermarket parts will result in a more complete model.
Window glazing, missing from the kit because of the incomplete tooling, was the most important item for me to add to the build to improve its finished improvement. Model railroaders often leave off window glazing, which looks to me abandoned or even zombie-like, so replacing the missing glazing was my first priority for improving the model. I used FineCast Flushglaze vacuum formed glazing, which I ordered from Peter’s Spares. I put the glazing aside until final assembly, after most of the painting and marking was complete.
The couplers included in the Deltic kit did not resemble the screw link couplings (in North America, we call them couplers; in the UK they are couplings) used in UK railroading. The kit provides thick, horizontal loops on shanks that bear no resemblance to actual prototype UK couplings. My quest for suitable replacements led me down the rabbit hole of how UK modelers do couplings in 00, the most popular of UK scales; I came away feeling fortunate that we North American modelers benefited the combination of prototype and modeling innovation that led to Kadee knuckle couplers and their descendants.
Ultimately, I sourced photoetched 00 screw link couplings directly from Roxey Mouldings, which assembled easily and installed simply into 1 mm holes bored into the Deltic’s pilots.
For markings, I ordered the Deltic Diesel prototype set direct from Fox Transfers, which included decal stripes, nose wings, and Deltic logo, and a fret of enameled photoetch placards and builders plates.
With the major subassemblies completed—body and frame, roof, and trucks, I prepared the model for paint. Masking tape blocked the side windows and front windshields; bits of paper towel were further stuffed into the cavity to protect the floors, seats and control stands from overspray.
All the subassemblies and various parts that would be added during final assembly, like horns and couplings, were primed with black Mr. Surfacer.
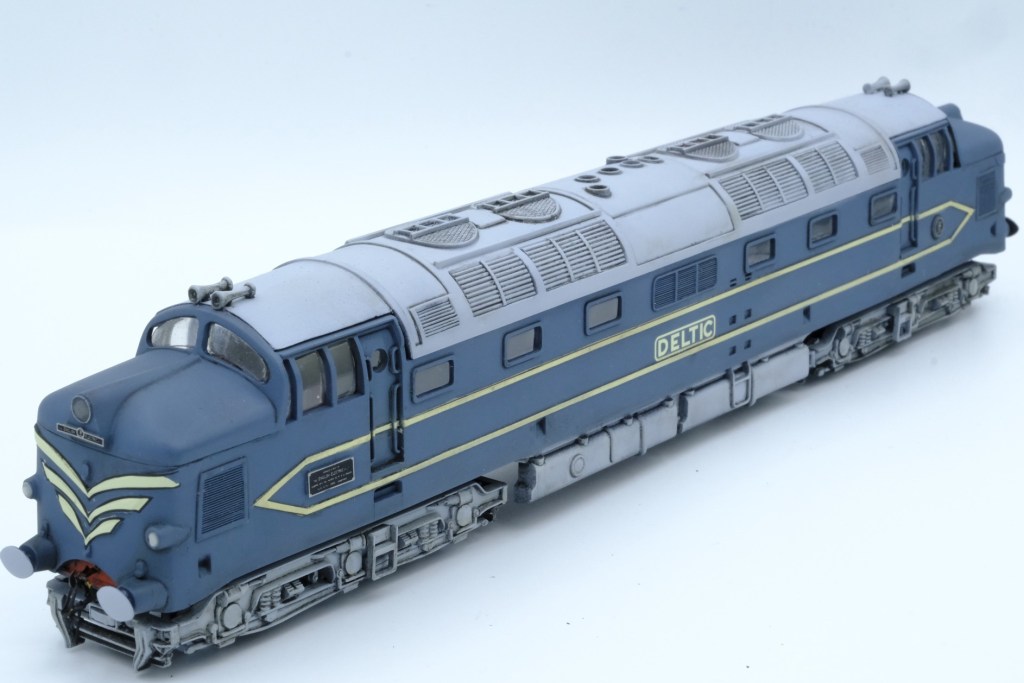
The Kitmaster model is intended to represent the Prototype, or Demonstrator, Deltic. Later in their service lives they were finished in the standard road liveries of British Rail , but the Kitmaster model features molded-in striping and nose wings, along with a few other details, that all but lock the build into the Demonstrator configuration. I didn’t want to scrape off and sand smooth the wings or the stripes, so I stuck with the classic Demostrator livery.
In photos of the Deltic during its initial service, and in their currently preserved state, the locomotive appears to be a dull medium blue or blue gray, with a light gray or silver roof and trucks. I chose Tamiya Medium Blue for the main body, and AK Real Silver Gray (a slightly metallic light gray, which kind of splits the difference between silver and light gray) for the roof, trucks, and under frame. The coupler pockets with painted red, per reference photos. Once the main paint was dry, I applied a clear gloss coat in preparation for decals and weathering.
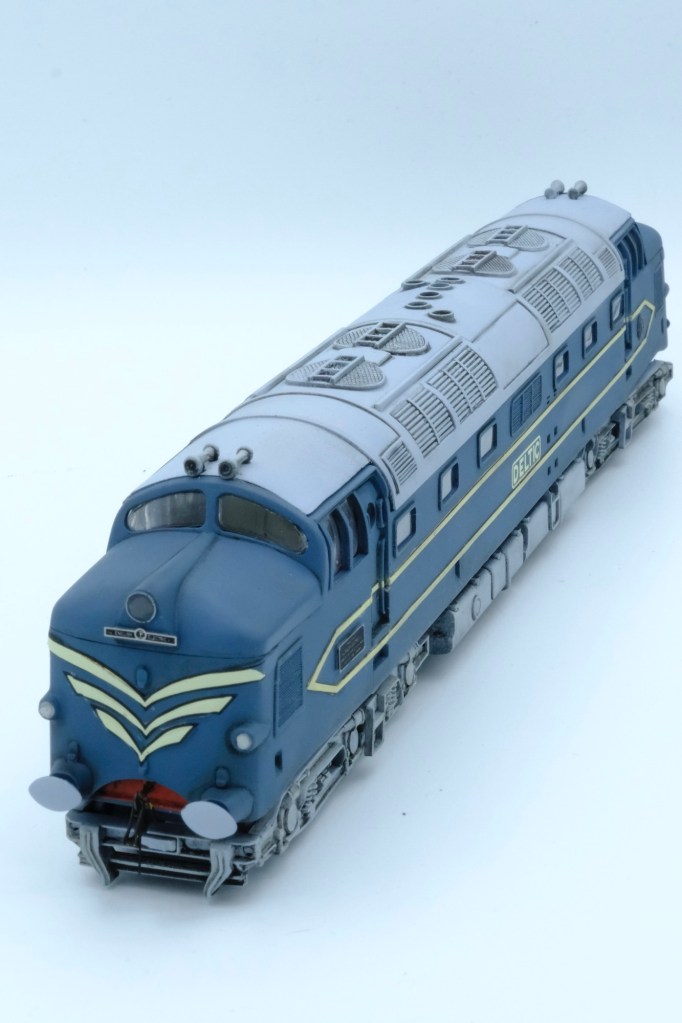
About those decals: the stripes don’t fit Kitmaster’s molded detail, so it might be more expedient to mask them off than to use the decals. The nose wings decals partly fit the molded nose wing details; I made do by ensuring my application was even and symmetrical. The side stripes scarcely fit at all.
I ended up masking off the raised, molded-in detail and applying a British Desert Tan/Cream color that matched the decals. The masking goes very quickly, thanks to the sharp, deep molding—just butt the tape up to the edge and press to seal. The nose wing masking would likely have gone just as fast had I not already applied decals to them. Indeed, the Dapol kit includes the only marking that cannot be easily masked off and painted, and that is the ‘Deltic’ logo on the sides.
In short, the Fox Transfer set’s decals might be redundant, while the enameled photoetch is quite useful, and indeed, the various plates and placards add significantly to the model. I attached them with AK Ultra Glue, which has ample working time and dries transparent.
With the decals and placards in place, a sealing coat of clear gloss was applied, followed by a pinwash of AK Dark Wash. The pinwash was applied lightly and carefully, with the intent of only highlighting detail, especially around louvers and fans, and not heavily weathering the subassemblies.
Once the pinwash was groomed into neatness with a blending stump, the subassemlies received a matte clear coat.
Once dried, the vacuformed glazing was fitted and cemented into place with Bob Smith Gold CA, formulated to not craze clear parts. The glazing generally fit well, but the curved windshields required careful coaxing.
The model was now ready for final assembly. The roof required significant extra wiggling, squeezing, and clamping. CA and accelerator ooze necessitated some post-assembly cleanup with sanding sticks and steel wool, followed up by touch up airbrushing.
Headlights were added with a silver Molotow painte marker, and a drop of Micro Krystal Klear. The large circular appurtenance that looks like as if it is a headlight is actually not, by the way. It appears in reference photos to be the same color and texture as the placards. I painted it dark gray and highlighted its rim with a silver Prismacolor pencil.
The build ended up taking a couple of months, mostly awaiting various aftermarket bits, and it took place between and betwixt other projects. It did require more aftermarket than I expected, and the required seam cleanup and filling also required significant time to work and re-work. Nonetheless, it was a rewarding build of an interesting railway memory from my visit to the United Kingdom.

Leave a reply to bawdsey Cancel reply