At nearly the exact tween-age moment I started to make connections between the railroad books and magazines I read and the real railroads around me in my home Calumet region of Northwest Indiana—“the Region” to locals—my favorite local railroad was undergoing a major change.
The Chicago, South Shore, and South Bend—the “South Shore”, as most everyone in the region knew it—was dieselizing after decades of electric freight service, right when I was beginning to be aware of such things.
The grownups around me folded South Shore diesels, along with Conrail and Amtrak, into the general assessment that everything in the Region was going to hell, including its railroads. Imagine these guys, who might as well have been most of the adult males I knew in my youth, griping about Japanese cars killing the steel industry, high mortgage interest, and bad Conrail track:
In the moment, plain blue GP7s seemed like joyless killers of South Shore’s awesome electric freight locomotives, first the boxy, vaguely foreign-looking 700s, which were gone by 1976 or 1977, and then the 800s, known to Region outsiders as ‘Little Joes’, which were withdrawn from main line freight service shortly after. The 800s, gone by 1983, lived out their final days in service as very large industrial switchers around Gary and East Chicago, Indiana.
Later I would learn that the cause of death of South Shore’s electric freight operations wasn’t worn out locomotives so much as a new coal power plant in Michigan City, Indiana. With seemingly heavy catenary, big mainline electric freight locomotives, and passenger equipment that looked more like commuter MUs than ‘toonerville trolleys’, the South Shore looked in many ways more like an electrified railroad than the ‘last interurban’.
However, one distinctly interurban feature remained after years of deferred recapitalization and maintenance: South Shore’s interurban-light direct current electric distribution infrastructure. Increased freight loadings, especially for that Michigan City power plant, which consumed coal by the 100-car unit trainload, maxed out South Shore’s dated substations whenever 700s and 800s dragged them from connections in South Chicago to Michigan City. South Shore’s passenger service—by these years, subsidized by Indiana and Illinois transit agencies, and expected to function in sync with adjoining bus and rail service—could not run reliably when electric freights strained the capacity of decades-old interurban substations.
Second-hand diesel freight locomotives were the necessary evil that brought South Shore’s freight operations back into sync with its vital electric passenger operations. GP7s, mostly from the Chesapeake and Ohio (which also had an ownership stake in the South Shore for a time during this period), usually in gangs of three or four, could drag unit trains into Michigan City without disruption to South Shore’s power grid.
From a late-70s tweenage (and to be fair, late-70s adult) railfan perspective, the blue ex-C&O GP7s were unremarkable, plain nothingburgers that killed off exciting and cool Little Joes.
Decades later, my attitude towards South Shore’s blue geeps has decidedly softened—but not enough to seek out an undecorated, correct-phase HO GP7 model and build up a ‘magnum opus’ superdetailed, super acccurate, DCC, sound-equipped South Shore GP7.

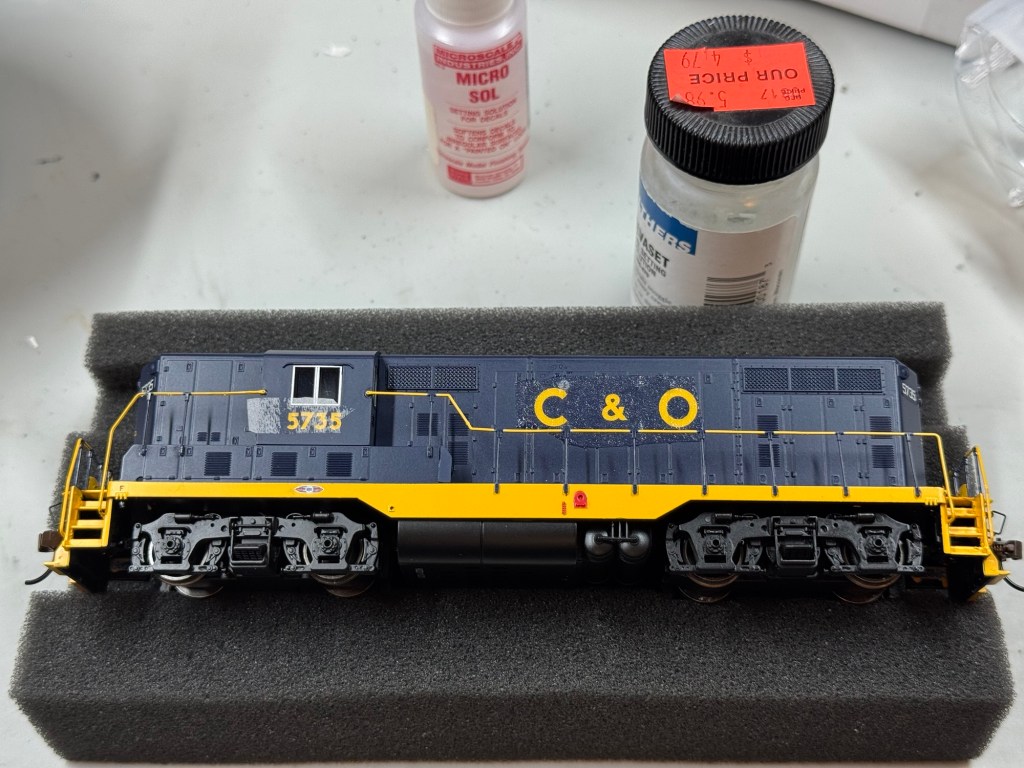
However, Bachmann’s recent release of a DCC-ready GP7 in C&O blue presented itself as a ‘good-enough target of opportunity’ model for a kitbodged South Shore GP7. Atlas offered a similarly configured and liveried C&O GP7 in two different road numbers in the 2000s that could similarly be used as a starting point for this project, but I know from personal experience that the Atlas models are especially difficult to source.
Waitaminit…‘Kitbodged’? This model is more clumsily improvised, or ‘bodged’, to borrow a word from our UK cousins, than constructed or ‘bashed’. The steps taken here don’t seem to earn the full rank of ‘kitbashed’. No cutting of this ready-to-run model took place—it wasn’t even completely disassembled!—just some details added and lettering replaced.
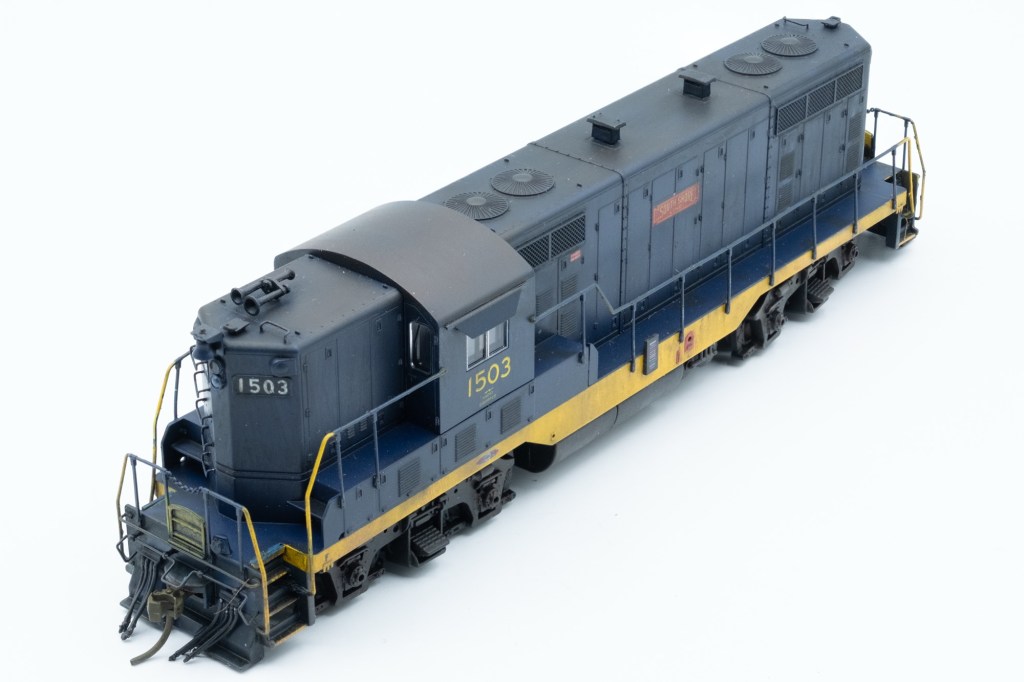
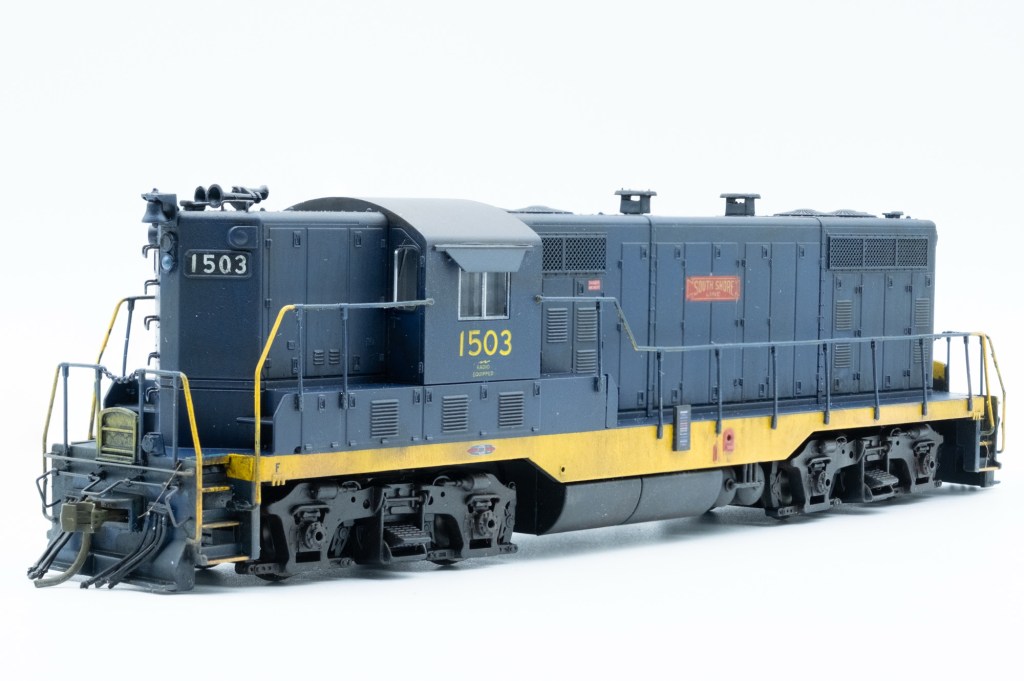
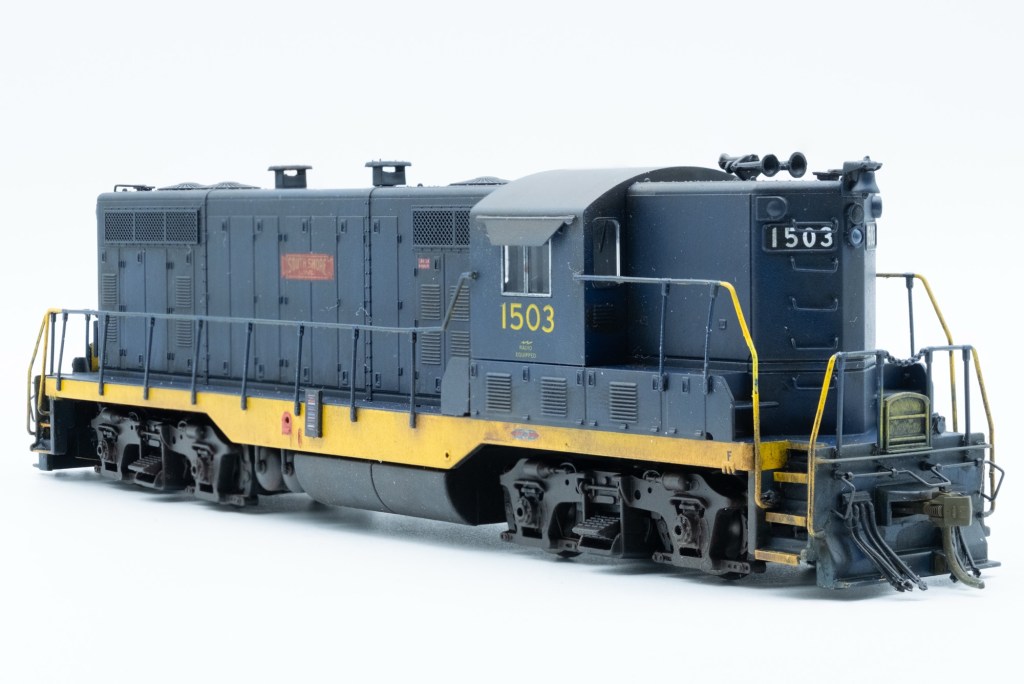
The Bachmann GP7 ready-to-run model is more or less the correct phase and gets most of the paint right for South Shore GP7s. A bit of additional paint, a few distinct details, and improvised decaling can make the model into a distinctive model of a blue killer of electric locos.
I first sought to ensure the model was in good electrical and mechanical order. While the model has a built-in speaker enclosure ready to receive a speaker and sound decoder, I opted to hew to the spirit of ‘good-enough’ with a silent DCC model. The ESU LokPilot V5 decoder with an eight-pin plug that I fitted and tuned made the model run smoothly and responsively; other, less expensive decoders would undoubtedly suffice. Bachmann’s oversized but functional couplers were replaced by Kadee #158 whisker couplers; fitting them required some trimming and filing of the inside bottom of the draft gear aperture on the shell in order to allow the Kadee #158 shank to shimmy onto the draft gear boss. Once fitted, the Kadee couplers were removed and airbrushed with thinned Tamiya Red-Brown, a grungy rusty brown color. Many modelers may choose to skip replacement of factory couplers.
Bachmann’s body shell is spartan but does the job. Numberboards are but molded-in details, with no clear inserts for illumination. Grab irons are ignored outright: not molded in, and no dimples to guide drilling for wire grab irons. I could have lived with molded-in grab irons, which many HO modelers regard as blasphemy, but I felt the need to add this prominent visual feature to the Bachmann model.
I used Tichy #3015 18” drop grab irons, and improvised a Tichy box car grab iron drilling jig for square, straight holes. Tichy offers these jigs separately (Tichy #3048), but they are also included in their box car and reefer kits, so I happened to have a couple of them handy.
To make the Tichy jig usable for the GP7 nose, the molded-in alignment strip on the model side of the jig must be replaced with a new alignment strip approximately 2mm away from the original strip to allow the jig to firmly abut the GP7 nose peak. The new strip must be square. The bottom of the jig should be carefully sanded to ensure the the spacing straddles the number board and remains square. A round needle file was used to notch the jig to clear marker light and step details—important to ensure the drilling jig lays flat and square on the nose surface for consistent, square drilling.
Once the jig was set, drilling the noses for grab irons was quick work. I used a drill size slightly larger than recommended by Tichy, which still resulted in a tight fit. I was able to drill the grab iron holes without even removing the hand rails.
Grab irons, along with other details characteristic of South Shore’s GP7s were prepared for attachment to the model: Detail Associates #SS1301 sunshades, Details West #294 MU hose clusters, Detail Associates #MU1501 Early EMD MU Stands, Cal-Scale #440 exhaust spark arresters, and an Athearn #1097 high-nose bracket bell. I primed these add-on details with Rustoleum rattle-can black primer, which I allowed to cure for a few days.
I then added drops of Tamiya X-1 Gloss Black to Tamiya XF-8 Flat Blue in a mixing cup until the resulting dark blue matched Bachmann’s C&O blue. The detail parts were airbrushed with this custom dark blue blend; the remainder of the custom paint mix was put aside for later use.
Removing the C&O lettering from the Bachmann shell required some experimentation. The method I arrived at: first, cut bits of lint-free tissue (I used Kimwipes; paper towel ought to work as well) close to the size of the lettering. Then soak the tissue on the model with Solvaset for one minute (I run a timer), taking care to not let the Solvaset pool or puddle where there is not lettering; the tissue concentrates the Solvaset on the lettering. After one minute, remove the tissue and blot up excess Solvaset. Stick a piece of Scotch Magic tape to the now-soaked lettering, burnish into the lettering, and then peel away the tape. Ideally, the Magic Tape will lift the softened lettering in one fell swoop, but multiple tear-offs of the Magic Tape might be necessary. Also longer or multiple applications of the tissue and Solvaset might be required.
This technique was mostly successful, working most effectively on lettering on flat, featureless surfaces. It was most successful on the numbers on the cab, and more or less successful on hood sides, with some lettering persisting in the gaps between the hood doors. However, the nose heralds were stubborn, requiring multiple Solvaset applications and additional scrubbing with a stiff-bristled plastic fiber pen brush. Ultimately, overzealous efforts to remove the nose heralds (and at least one spot on the hood) required touch up, which I had expected and planned for.
The factory-finished number boards were impervious to Solvaset and tape lifting. I instead used a chisel blade intended for flush removal of details to carefully and gently scrape away the softened number board graphics. After scraping away the graphics, steel wool smoothed away remaining crumbs and shavings from the number boards.
With the lettering now removed, the pre-painted detail parts were attached to the body shell with CA cement. The grabirons were aligned into uniformity with a strip of .030” styrene, and cemented with thin CA from the inside of the shell. Once dry, the protruding tails of the grabirons inside the shell were snipped and clipped flush so that the tight-fitting shell would fit back on the chassis.
The shell was prepared for color blending and touch up necessary after lettering removal and manhandling of the detail parts. The yellow sill stripe and drop steps were covered with 10mm Tamiya masking tape. Short segments of 2mm Tamiya masking tape were placed on the edges of the steps at each end. Fusion Scale Models EMD Locomotive Window Masks (FSG-LM100-87 ) were placed over the cab window glazing and headlight lenses.
First, the attached detail parts were airbrushed again with the custom Tamiya dark blue mix, now heavily thinned, to blend into the surrounding factory paint. Areas from which graphics were removed were similarly touched up.
Next, the pilots and horizontal handrail portions that were factory painted yellow were airbrushed dark blue. I used a combination of masking tape, 3M Post-It notes, and old business cards to mask on the fly, keeping overspray off the hood when painting horizontal runs of hand rails, and off the vertical segments of handrails around the steps that should remain yellow. The work of updating Bachmann’s factory colors to South Shore’s paint scheme went surprisingly fast. All masks except for the windows and headlights were removed, and the shell, fuel tank and truck side frames were clear coated with GSI Creos GX100 gloss.
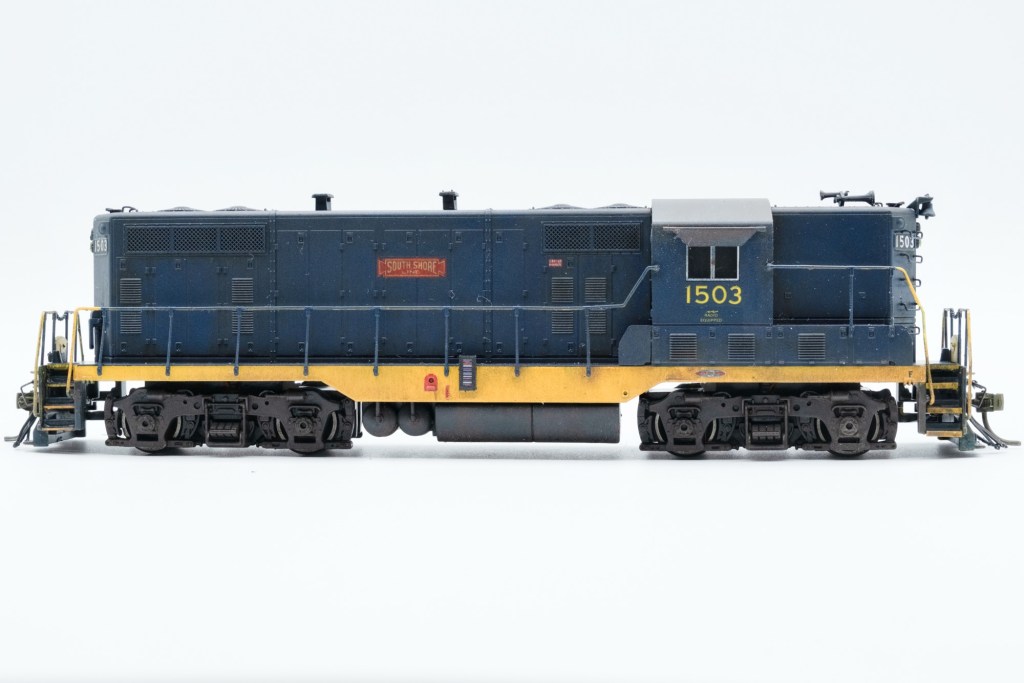
Decals for the South Shore GP7 were themselves a bash, drawing from five different sets. The heralds are from an ancient Champion South Shore passenger set PH-117 (out of print, but which I had in my stash); Fusion Scale set FSG-CSS102-87 contains these heralds and is readily available.. The cab numbers and ‘radio equipped’ stencils are from Microscale set 87-401, C&O/B&O 60s-70s diesels, and number boards are from Shell Scale set #HO105. Two Smokebox Graphics sets provided two small decals each: the #DF0787 ACI Kartrak set provided the bar codes, applied to a bits of .100’ x .020” Evergreen strip cemented to the frame, and high voltage warning stickers from #DL6387 Locomotive Data 2010+ set applied to long hood doors between the cab and the engine block. All decals except the Champ heralds responded well to Micro Set and Sol; the old-school Champ decals required stronger, old-school Solvaset.
Once decals were acceptable and dry, the model received a sealing coat of GX100 gloss, which cured for over a day before starting weathering.
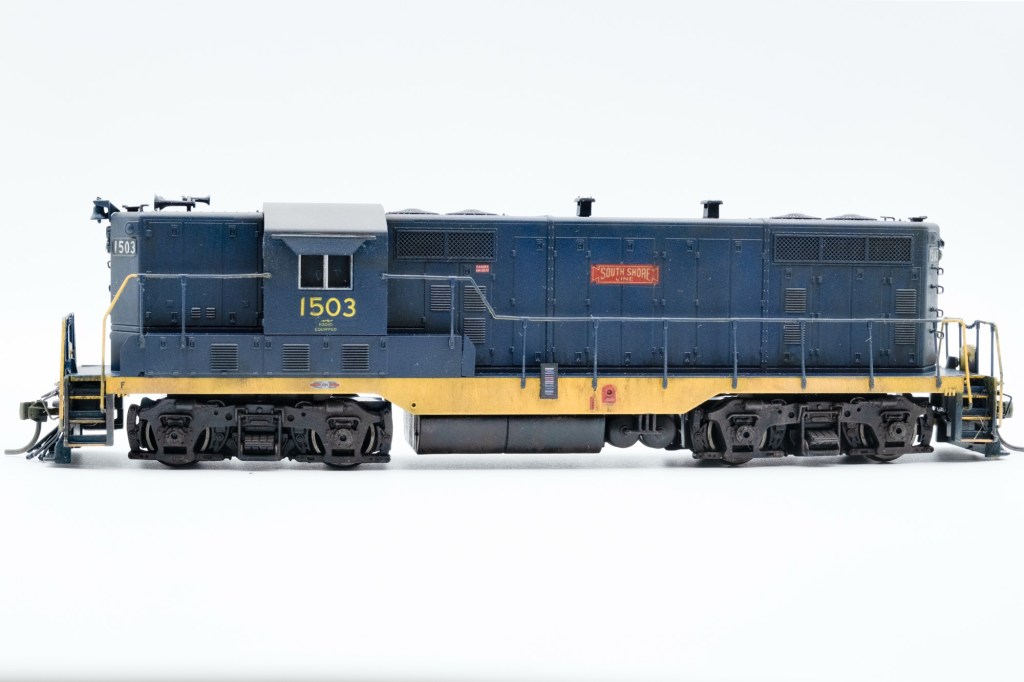
I first pin washed the fans, screens, and louvers with MiG Ammo black enamel wash. The rest of the shell, fuel tank, and truck side frames received a MiG Ammo dark wash, which is a grungy dark brown. Specific effects were applied with tube oil paints, such as fluid leaks around certain vents and fuel fillers, black exhaust around the spark arrestors, and rusty streaks on the cab roof and sunshades. Once I had weathering colors and effects where I wanted them, I clear coated the shell, fuel tank, and truck sideframes with GX100 matt.
After curing for several days, the model was reassembled and remaining window and headlight masks removed.
My initial concept of a ‘good enough’ South Shore GP7 of the late 70s worked out, for the most part. It ended up requiring only slightly more effort than anticipated. To my eye, it looks right. I sadly don’t have any of my own Kodacolor 110 photos of these machines on hand, but photos of the real things can be found here.
I look forward to having this loco on the track next to its pantographed siblings and Region peers sometime soon.


Leave a comment