I travel overseas from time to time with my spouse, and last month we visited the United Kingdom for a rail safety conference, which I wrote about for Trains.com. I often return from my overseas trips with model trains, so it was inevitable that some model train stuff might would return home to the U.S. with me.
This Peco Parkside O Gauge/7mm Fruit Van kit called out to me while I was visiting the excellent Monk Bar Model Shop in York, United Kingdom, so I bought it as a souvenir. A major reason the kit resonated with me was my friend Trevor Marshall’s 7mm scale Bydemill layout, featuring Edwardian-era UK trains—think British trains in the time of Downton Abbey, which look like (and actually are) the real-world inspiration for Thomas the Tank engine.
Trevor has been posting his progress on Bydemill over the past few months, and over the years he has also assembled a modest collection of outstanding modern-ish UK rolling stock in the ‘Senior Scale’, as British model rail publications sometimes call O. I’m curious, by the way, what Trevor intends to do with brawny O scale UK diesels, fetchingly weathered and outfitted with big ol’ speakers to pump up the jams of custom loco sounds.
When I found Monk Bar’s small but respectable selection of O scale kits, I immediately sensed an opportunity to experience Senior Scale modeling for myself. I enjoyed browsing the carefully stacked Peco Parkside kits, identical stubby boxes in similar proportions to the models depicted on their labels. I had no idea what I was looking for—I just went for a car that looked pleasing and well-proportioned.
About those proportions: to an American eye accustomed to freight cars that clock in between 40’ and 60’, UK freight cars are, well, stubby, customarily less than 20’, and with two fixed axles rather than trucks (or ‘bogies’, in UK parlance).
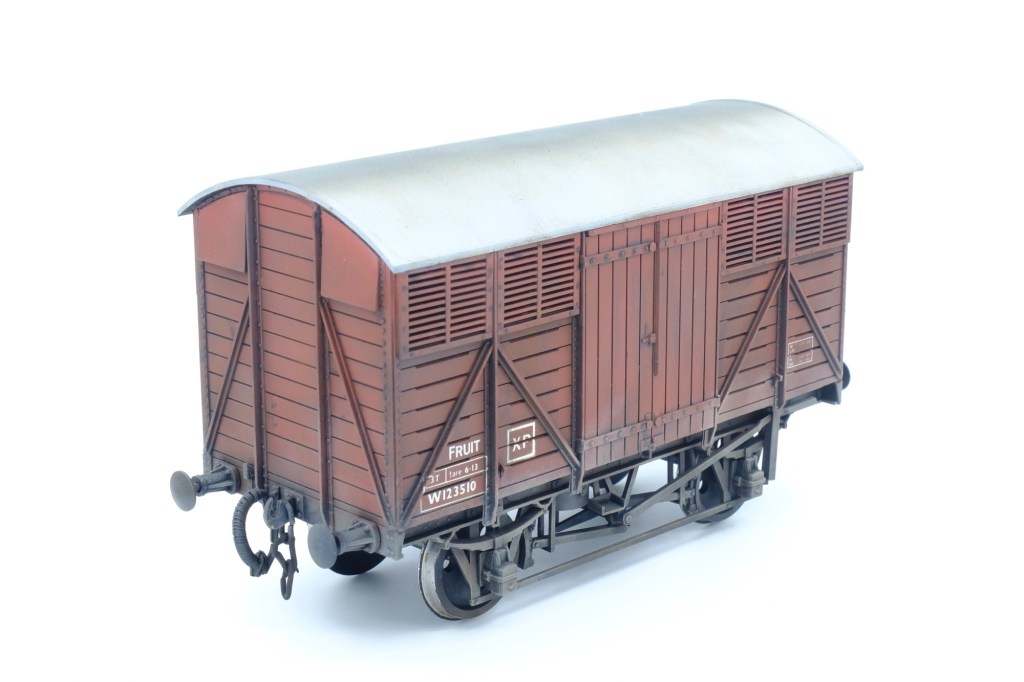
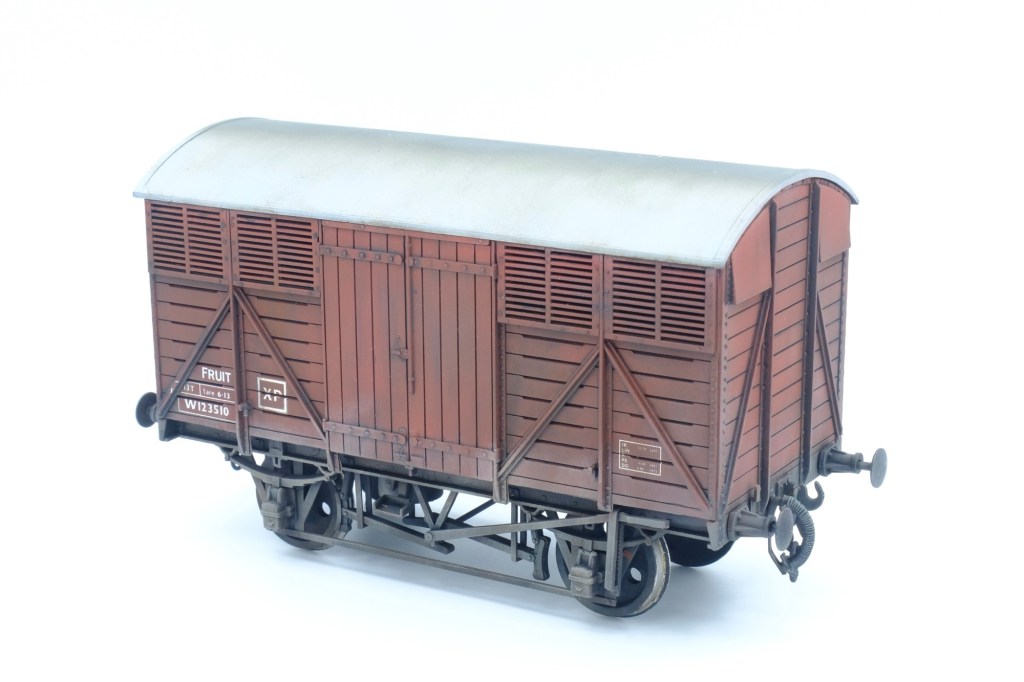
I chose the ‘Fruit Van’, a box car ventilated with large louvers and slots between the wood planks that sheathe the sides of the car, because it looked interesting and a little gnarly. Also, the name ‘Fruit Van’ seemed especially British. Per the instructions, these cars were principally intended to transport tomatoes and other produce to market—which apparently worked in cool, cloudy, Old Blighty, with its relatively short mainline routes. These cars were originally built in the 30s and ran well into the 60s and early 70s.
The Peco Parkside kit is mostly injection molded styrene, with metal wheels, couplings, buffers and brake hoses. The instructions are numbered paragraphs of text supported by an exploded view diagram, which are clear and legible thanks to good printing on decent paper stock (take a note there, Tichy Train Group and Revell of Germany). Peco Parkside provides decals appropriate for Great Western (30s and 40s), early British Rail (late 40s and 50s), and later British Rail (50s and 60s).
Assembly is straightforward and fit is excellent overall. The floor, roof, sides, and ends are separate flat moldings that align squarely with negligible gaps. A 1-2-3 block is particularly helpful for aligning the major parts during cement application. If weight is to be added to the inside of the car body during construction, it should be done before attaching the roof.
Assembly of the running gear requires a bit of care, but the sequence is well described in Peco Parkside’s instructions. Careful fitting of the journals into the W irons is key, making sure that they can move up and down freely. All of the running gear parts fit together like puzzle pieces.
A length of styrene rod stock must be trimmed to fit between the brake pivot bearings on both sides; I did this slowly and patiently, filing the rod end until it could fit between that spans without cement. Once it fit, I applied cement.
Stirrup steps are provided as photoetch parts that must be folded and cemented into place. A kink in the main strut is intended to fit squarely onto the lengthwise frame beam; this kink resulted in breakage on both my stirrup steps. The creases probably should be reinforced with melted solder, which I will do when I assemble another Peco Parkside kit in the future. I fitted my involuntarily shortened stirrup steps nonetheless; apologies to all the old GWR heads to whom the stirrups steps likely look horrifically wrong.
Fitting the couplings and buffers was particularly satisfying. The couplings consist of heavy photoetch hooks with forked shanks that must be bent to retain springs, and links of heavy chain and ‘Instanters’. The buffers are sprung, with a small brass nut retaining the spring. The assembled buffers are friction fit into the the end or buffer beams.
With construction done, the car was prepped for paint with a thorough dusting with a Tamiya antistatic brush, followed by a wipe-down with denatured alcohol.
I applied my customary Mr. Surfacer black primer to the whole car for a black-based finish. I waffled about the paint scheme, but ultimately homed in on the latest version of the car, the better to fit with a possible brawny, weathered diesel that might conceivably join my collection.
That late scheme has an aluminum gray roof, ‘bauxite’ sides and ends, and a black frame and running gear. For the roof, I used AK Real Silbergrau, a very slightly metallic light gray. AK Real dries very quickly, so I was able to mask off the roof and turn immediately to the sides and ends. Bauxite turns out to be a variation of U.S. boxcar red, well represented by the Tamiya LP lacquer color Dull Red. Tamiya LP also dries quickly, so I was able to quickly mask off the sides and ends for an application of AK Real Rubber Black—arguably the spiritual successor to old school Floquil Grimy Black—to the buffer beams, frame sides, and side frames. After giving the lacquer paints 24 hours to off-gas and cure, the car was clear coated with Alclad Aquagloss in preparation for decals and weathering.
The late BR decals are few, and small. They responded well to Micro Set and Micro Sol. The box decal framing the car number does not fit as illustrated in the lettering diagram between the diagonal and vertical side braces, so the upper left corner needs a little 45-degree snip. I let the decals dry over night and used a fresh scalpel blade to slit them along the plank joints and beams, and re-applied Microsol to settle the decals into the planks. Once dried, the decals conformed to the plank joints and looked painted on. They also received a sealing coat of Aquagloss, which set overnight in preparation for weathering.
Weathering had technically begun with the black-based finish, the point of which is to give the principal colors depth and shadow to suggest mass. After decals and gloss, the model received a pin wash using AK Dark Wash, a pre-mixed enamel wash. After the enamel set for a few days, dots of oil paint were applied all over the model: raw and burnt umber; Abt. 502 dust, light earth, and starship filth. The running gear received mostly umbers and starship filth dots. A wide flat brush moistened with Turpenoid blended the dots with straight, downward strokes, subtly discoloring the paint and creating the look of built-up grime and rust. Abt. 502 light earth was dry brushed liberally on the running gear and the bottom quarter or so of the sides. A final step was to airbrush an overall smoke stain concentrated on the peak of the roof with dark gray lacquer thinned 20% paint/80% thinner. A coat of clear flat acrylic locked everything down.
My first encounter with UK stock in the Senior Scale was a satisfying success—fun to build, fun to paint and finish, and fun to imagine being pushed and pulled around a small layout like Trevor’s Bydemill or this little gem, The Sidings (via Facebook). And a very nice souvenir from my visit to the UK!

Leave a comment